
Since we’ve owned our Weekender I’ve noticed that the rubber seal on the edge of the pop top was coming loose on a regular basis. It seemed like normal driving was making it come loose, and made me think that the old gasket either needed to be glued in or replaced. This problem didn’t seem unique to our car – I’ve seen the same thing on other Weekenders.
I noticed that when I closed a door, and especially the rear hatch, the whole roof would bounce up and down from the air pressure. This loosened the compression on the seal, and if that seal wasn’t firmly attached it would eventually cause the seal to sag downward. This is bad if you’re in a rainy climate (like us) because it makes it more possible for water to enter into the interior.
I started looking around for articles on this seal problem. I found some information on TheSamba.com, but that was for emergency repair. So I checked on GoWesty.com, and they had replacement seals in stock for the Eurovan Weekender. They also had instructions. Here is a link to their part page. After reading through the instructions I thought it didn’t look too difficult, so I purchased one of these replacement seals plus some adhesive to glue the two ends together.
It was still winter when I bought the parts, so I put them away for a nice, sunny spring day. Finally I had the perfect combination of weather and free time to do the job, so I started in.
I followed the directions, first removing the old seal. I found that it had been glued in place at the corners of the pop top, but every where else it simply fell off on its own weight. I cleaned off the glue and the dirt from the pop top surfaces.
The next step was to install the new seal. The biggest question I had was interpreting the instructions where they say to “install the new seal with the bulb and the ‘fang’ on the inside of the U-channel oriented inward.” This didn’t make much sense to me, so I compared the old and new seals. They were very different! Here’s a side-by-side photo.
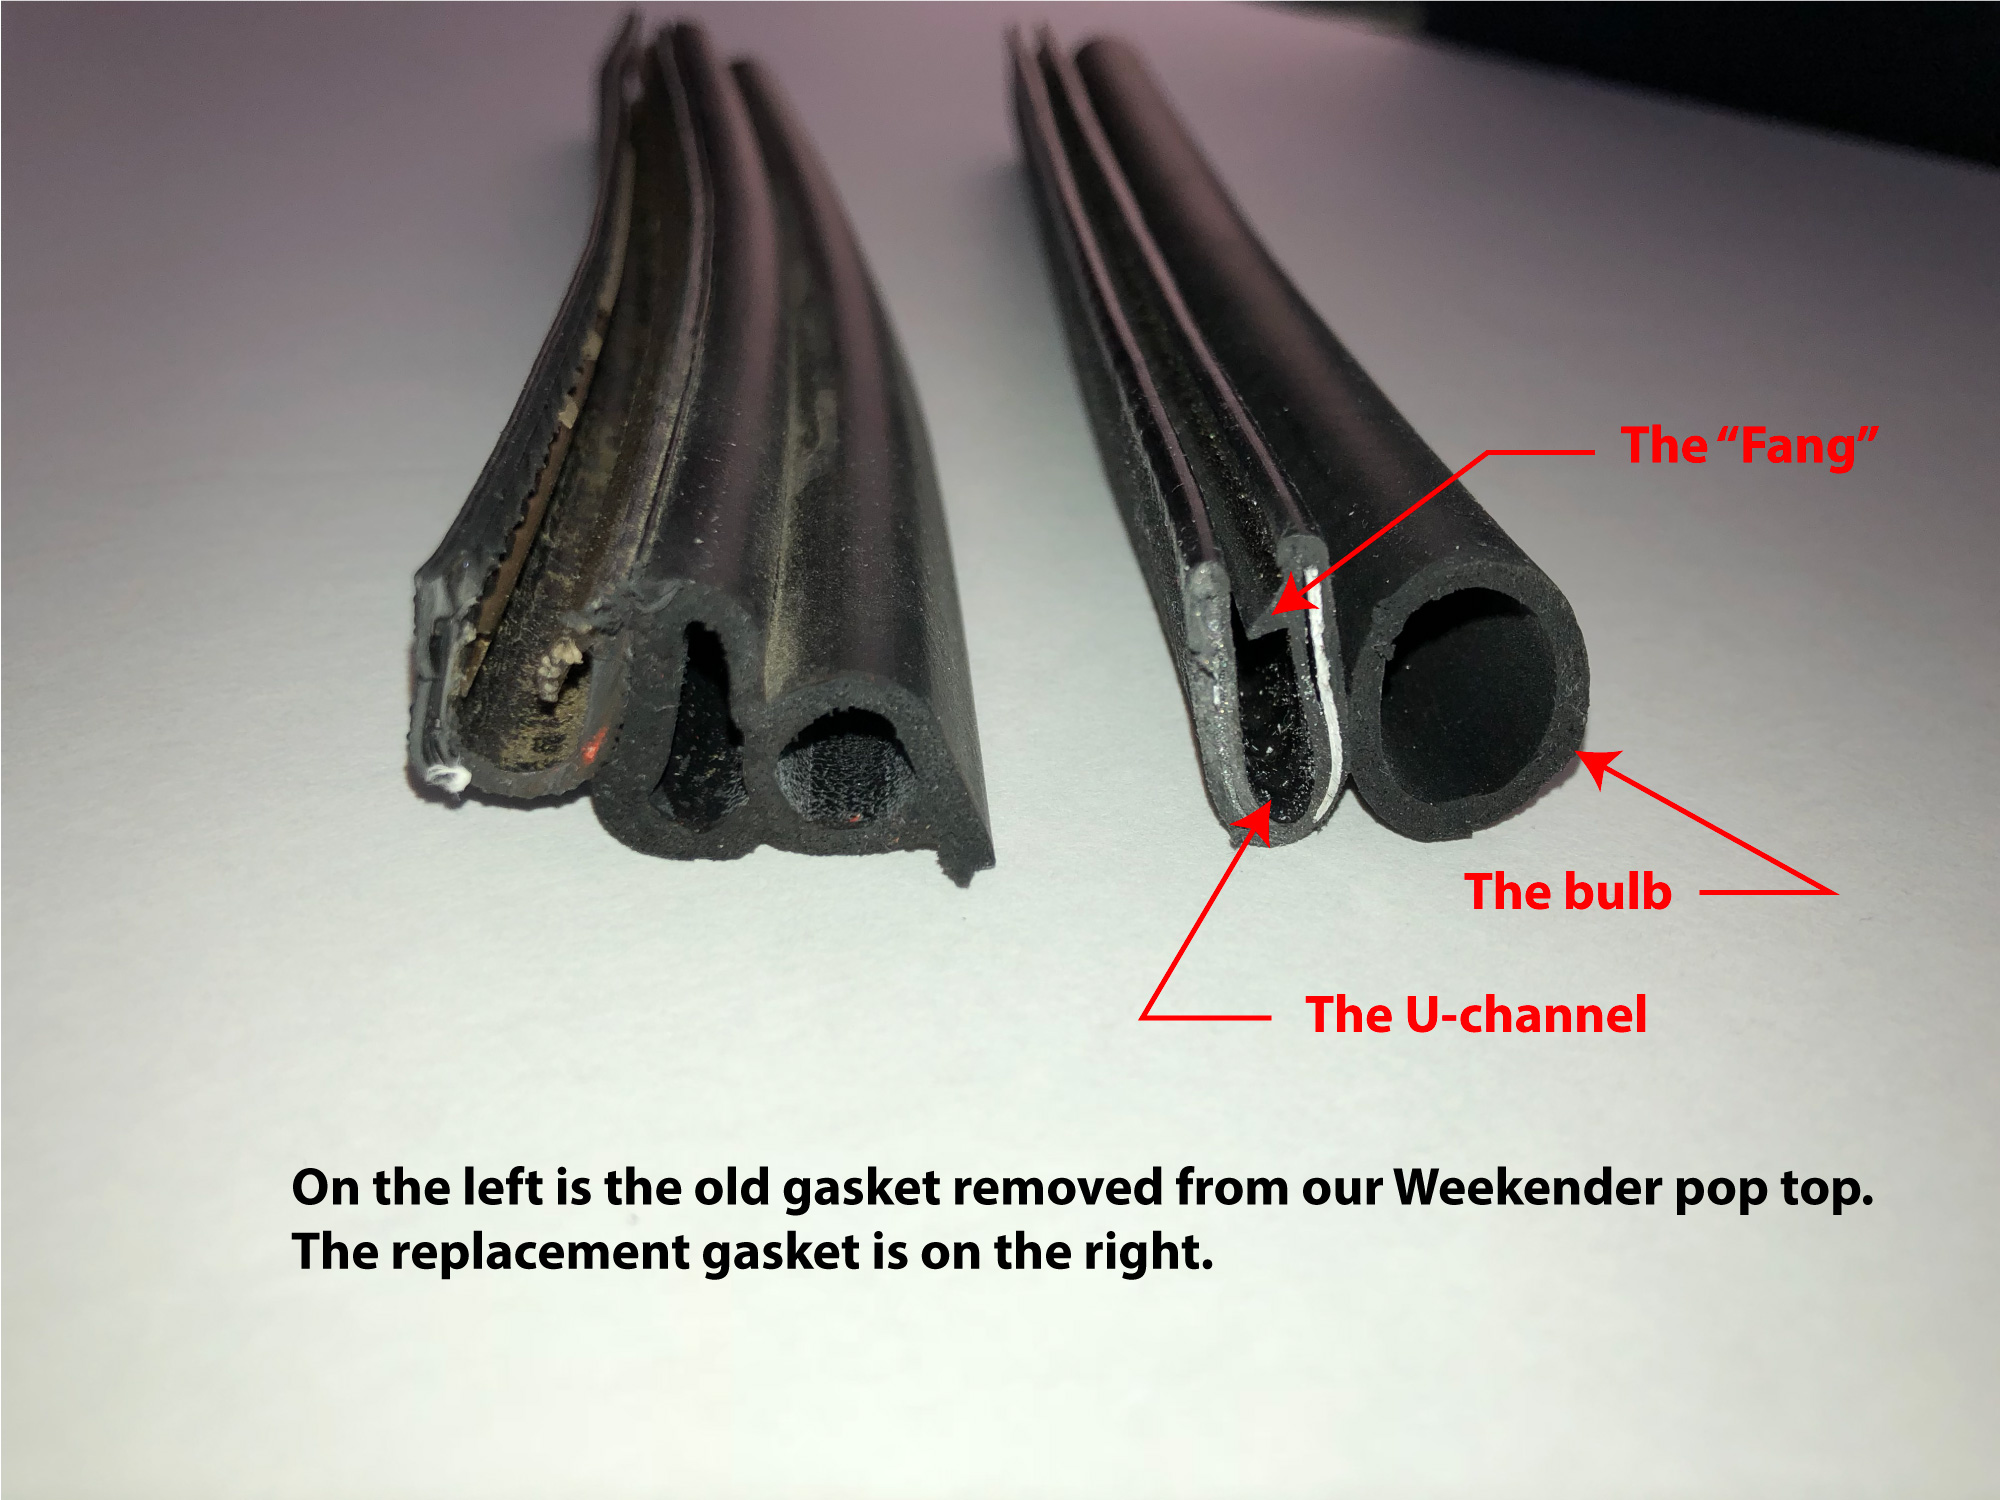
You can see several things in the photo. First, notice how different the seals look. You can also see how much narrower the gap in the u-channel is in the new seal when compared to the old one. The u-channel, bulb and fang are identified in the photo.
Once I got the nomenclature figured out, I started putting on the new gasket. I began by using only finger pressure, but this took a lot of effort and my progress was very slow. I tried using my rubber mallet to tap the seal in place and things went much faster. When I got to the front of the pop top I absolutely needed the rubber mallet – there was no other way to get the leverage needed to put the seal in place.
When I got to the end I used a Ginzu knife to saw the seal off to the proper length. The inside of the u-channel has aluminum fingers that make the channel hold its shape. I didn’t know this until I started cutting the seal, but it was no problem to cut it.
I smoothed both ends of the seal with a sandpaper block, cleaned them, and then applied the adhesive to glue them together.
The seal replacement took about an hour and half total. There was a lot of learning that went on, so I’m sure if I had to do it again it would take maybe half of that. I’m very happy with the result, and based on how tight the new seal fits I’m sure it won’t be coming loose any time soon.
January 2021 Update
It’s been over two years since I replaced the pop top seal, so I thought I’d post an update. The new seal has worked perfectly! It’s weather-tight and has not moved at all since installation. The sagging of the old seal was my main headache, and the new seal totally fixed that problem!